Draft System Installation Checklist for Your Beverage Wall
How exactly does a PourMyBeer project go from a plan to a completed self-pour setup? While PourMyBeer provides the self-pour hardware and software that turns a traditional dispense system into a PourMyBeer-powered self-serve system, you will also need a local draft installation expert to provide the traditional draft system.
To take you through the draft installation process, we partnered up with our friends at Perlick, who have been helping people pour their beers for more than a century. From choosing the right type of draft system for you to understanding every single component and its functionality, below is our checklist for the draft installation part of bringing your self-pour beverage wall to life.

Checklist for Draft System Installation
- Choose the Right Type of Dispensing System
First, you will need to identify the type of system your location will be using. There are a few different options for self-serve beverage walls.
Long Draw Dispensing Systems
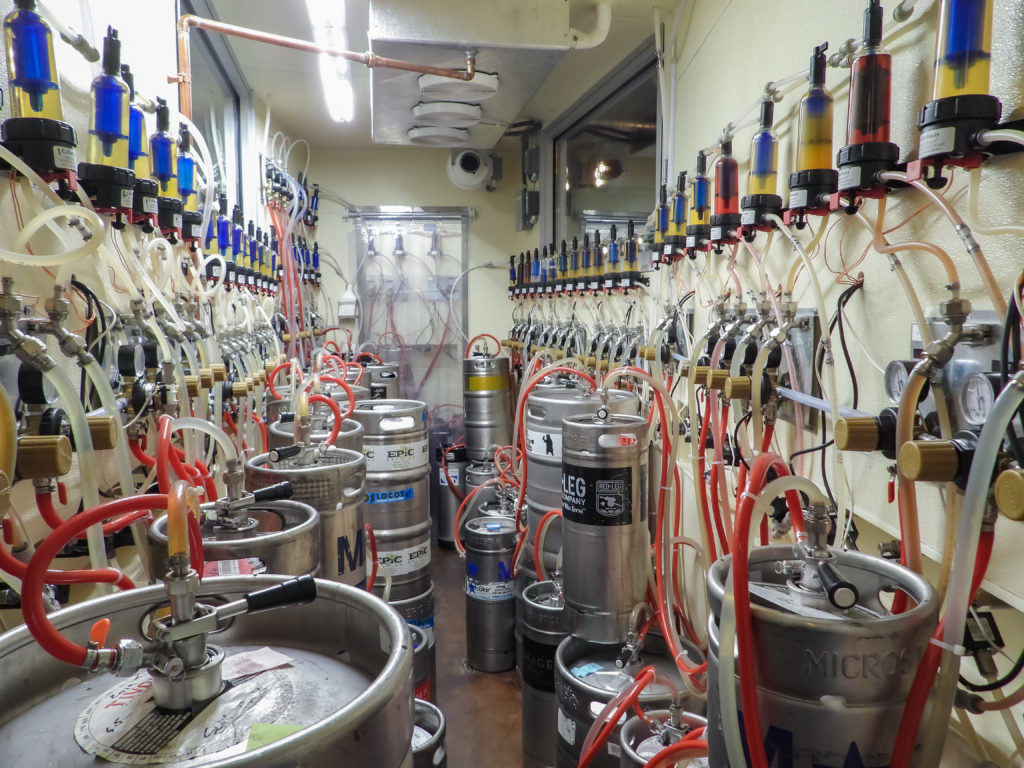
This is the most common type of draft system seen at PourMyBeer locations all over the world. Perlick Product Marketing Manager for Beverage Dispensing, Erin Geiger, explains, “Long draw systems are used in cases where the kegs are stored in a walk-in cooler some distance from the dispensing walls. In these situations, regulator panels mounted in the cooler dispense pressurized gas to the keg to push the beverage through the trunkline, and ultimately, to the dispensing tower. Power paks act as the refrigerator and pump cooled glycol through the coolant line within the trunkline. Each beverage line in the trunkline is positioned around a coolant line, which ensures the beverage will remain chilled from the time it leaves the keg to the time it is poured.”
We want your beer to pour like liquid gold. Beer is the only beverage that will not pour well if you don’t have the temperature and pressure dialed in. That is one of the benefits of a long draw system – the temperature of the beer is controlled by the glycol mainly. This ensures that from the time it is in the glycol line to the time it gets to the faucet, it’s a consistent temperature. That being said, out of the 370+ locations we’ve done, roughly 30% are direct draw.
Direct Draw Systems
While long draw systems are the most popular, direct draw systems are preferred.
Why is a Direct Draw System Preferred?
- Convenience – Your kegs are just a few feet from where the taps are.
- Ease of Installation – With the meters and valves on our system only a few feet from the screens, this requires much less splicing of cables.
- Cleaning Lines Costs Less – It will cost the same to get your lines cleaned (which you should be doing religiously every 2 weeks), but instead of dumping out 6 to 10 (48 oz to 160 oz) beers per line every time you clean the system, you’re only losing about 1 beer per line. This adds up over time, especially if you have a high number of taps.
- Cost of Installation – Your costs to install a direct draw vs. a long draw system are usually at least $3,000 to $5,000 less, depending on the number of lines and distance from the cooler to the taps.
There are 3 steps to choosing a proper refrigeration unit:
- Decide how many kegs you plan to keep on tap. This will determine the size of the refrigerator you choose.
- Decide what type of product(s) you will dispense. Single and dual-zone models are available. Dual-zone models allow you to keep beverages at their optimal serving temperature, letting users pour beer and wine at precise temperatures.
- Stationary or Mobile: Will the unit be built-in, or will you deploy it on demand? Perlick’s mobile concessionaire direct draw units are designed to be deployed wherever beverage service is needed.
Tapping Through the Wall
Mount faucets and shanks through the wall of the walk-in cooler and dispense beverages on the other side of the wall. This is a less expensive way of creating a system to dispense several beverages on one wall as it eliminates the need for a power pak and trunkline. Perlick faucets have forward sealing technology that is reliable and minimizes bacteria growth.
Now that you have a beer system installed, you must include and maintain several components to ensure the best product possible. Perlick takes us through several of the components you must consider below.
- Refrigeration
You should try to understand the refrigeration system that you will be using for cooling beverages. Typical installations for PourMyBeer self-pour setups are long draw systems. The type of dispensing system will be determined by the availability and location of your cooler and the number of kegs requiring cooling.
Generally, beer is served between 36-39°F, so a walk-in cooler should be set to 34-35°F. A back bar cooler should be set to the desired beer temperature. Allow kegs of beer to “settle” and come up to temperature for 24 hours before tapping.
HELPFUL TIP
Do not store your kegs in the same cooler (walk-in or back bar) as food. This leads to a high fluctuation in the temperature of the cooler, thus causing foaming issues with your beer.
- Line Cleaning
To make sure you are delivering the highest quality beer to your customers, lines should be cleaned every 2 weeks by a certified line cleaner. Here are the basic beer line cleaning steps:
Preparation
The cleaning solution and rinse water should be pre-prepared. The temperature of the line cleaning solution should be in accordance with the manufacturer’s instructions. If there is no temperature listing, then prepare a tepid mixture. With rinse water, the colder it is, the better. This will cool the system before the beer re-enters it.
Contact
In most situations, it is recommended that the cleaning solution be recirculated through the system or left to stand in the system for a minimum of 15 minutes. In hard to clean or long draw systems, increasing the amount of time the cleaning solution is in contact with the line will improve the results.
C02 driven pumps should not be used for lines longer than 25 feet.
Steps to clean beer lines
- The line cleaner should disconnect the keg couplers from the kegs.
- Use a double flusher to connect the 2 lines.
- Remove the faucets from the tower.
- Hook up the motor-driven pump.
- Connect a jumper line to one faucet and place that line in a bucket or sink. Once the beer is completely out of the system, place the jumper line in the bucket with the cleaning solution and let it recirculate for 15 minutes.
- At this time, the line cleaner could clean the beer faucets.
- Once the faucets have been cleaned and the lines have recirculated for 15 minutes, it’s time to rinse the line with cold water.
- For every gallon of line cleaning solution, the line cleaner MUST use 2 gallons of ICE water to rinse the lines to make sure all of the line cleaning solution is out of the lines.
- For example: if it takes 5 gallons of line cleaning solution to clean the lines, then they need to use 10 gallons of ICE water to rinse the beer lines.
- To ensure the line cleaning solution is out of the system, they must use PH testing paper.
- Once the lines have been tested, re-installed the faucets on the tower, and all of the line cleaning solution is out of the system, they could re-tap the beer.
- If after testing the system with PH paper and there are still traces of line cleaning solution, they must repeat the rinsing steps.
- Once the beer starts to come out of the faucet, have the line cleaner shut the faucet and the system will be ready for use in 20 minutes.
- Back Splash
Stainless steel, copper, and an easily cleaned tile are all good options for a through-wall installation.
- Gas
The type of gas used on a system is determined by the design of the system, including the length of the run, lifts, and drops. The options are CO2 or mixed gas, which consists of blends of nitrogen and CO2.
- Smart FOBs vs. Regular FOBs (Foam on Beer Detectors)
FOBs are a great way to reduce waste and save money. When the keg is empty, the FOB stops the pour and keeps the line full of beer until you replace the keg. This means the beer in the line can be poured and will not turn to foam and become liquid waste (and profit waste). Geiger explains that Smart FOBs are not the same as Perlick’s FOBs. “Smart FOBs monitor the dispensed volume. In a Perlick beer system, the FOB attached to the regulator panel immediately stops the flow of beer when the keg becomes empty. This keeps the line full of beer and prevents waste by minimizing the amount of foam dispensed.”
Check out Perlick’s FOB User Guide Video to learn more about the importance of FOBs.
- Drip Trays
Drip trays are critical to catch any spills or overflow. Choose a drip tray that fits the length of the tower.
- Power Paks
Perlick Power Paks are highly efficient with a glycol reservoir size of 1.75 gallons and can pump up to 100 gallons per hour, ensuring the beverage lines remain at the optimal temperature.

- Recommendations for Cocktails on Tap
Cocktails on tap are usually batched in-house and kegged to save time and money. The Perlick cocktail system includes a pump that circulates the cocktail mixture. The cocktail mixture can be dispensed through a tower with 304 stainless shanks. Most bars do not pressurize kegs for cocktails. Rather, the cocktails are “still,” and the carbonation (like sparkling water) is added to the glass afterward. Sparkling wines can be served on tap, but they need to be pushed with CO2 like beer. There are very few sparkling wines served out of kegs.
Once when your draft system is installed you’re ready to roll out the red carpet, we’ll have one of our installers come down to your establishment and connect your draft equipment with our tech, making it a complete self-pour taproom. We are truly excited to officially welcome you to the PourMyBeer family!

&

PourMyBeer and Perlick make a great team. Like PourMyBeer, Perlick is committed to providing the ultimate experience for customers. So when you combine PourMyBeer’s self-serve technology with Perlick’s time-tested products… well, you’ll have an unstoppable self-pour beverage system.
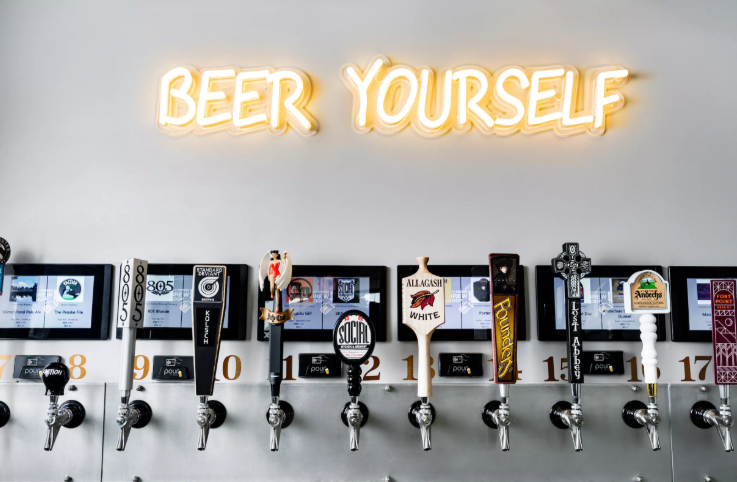
Below is an example of a PourMyBeer & Perlick beverage wall setup at Buffalo Wild Wings Express.
If you’ve ever dreamed of owning a bar but are unsure where to start, we have just the resource for you! PourMyBeer’s Self-Pour University has three stages to take you through every aspect – from idea to completion!
You can learn more about Perlick’s beer dispensing and all commercial products on their website. If you have any questions, don’t hesitate to contact us at cheers@pourmybeer.com or (312) 416-9989.


