


Welcome to the ultimate guide on setting up your beverage wall, where we’ll dive into the exciting world of wall-mounted beer taps to create the perfect drink wall that will entice your customers and be the envy of your competition.
We’ll walk you through the step-by-step process of how to make a beer wall that will enhance your space and offer a unique and interactive experience for your patrons. So, grab a pint and get ready to tap into the wonders of the beer tap wall!
How to Properly Set Up Your Self-Pour Beverage Wall
Although starting with a great location in a neighborhood where your desired market is will ensure you get a good amount of foot traffic to your business, setting up your beverage wall will increase word of mouth and discoverability. We put together this piece to detail everything you need to know on how to make a beer wall!
You should keep these nine main categories in mind when it comes to planning your drink wall layout:
In this guide, we’ll give you all the info you need for each of these points! And if you need quick inspiration, feel free to take a sneak peek at our installation gallery or check out the video below. Get ready to create an extraordinary beer tap wall and make your establishment the go-to destination for beer enthusiasts and beverage connoisseurs alike! Now, let’s dive into more detail about each of these nine categories.
Download our self-pour do's and dont's guide below to study later!
1. Where to Locate the Beverage Wall
Knowing where to locate your beverage wall will be one of the first parts of the planning process for your self-pour setup. Find the perfect spot in your venue to showcase your drink wall, ensuring it’s easily accessible and visible to your customers. While the location will largely depend on the structure of your venue space, you will want to ensure the drink wall is as prominent of a feature in your establishment as possible. Self-pour is fun, new and interesting, so make it a central highlight rather than an ancillary feature.
Generally speaking, there are a few good location guidelines to experiment with your wall-mounted beer taps. While you won’t be able to check all of these at once, you should plan to set up your beverage wall in a way that meets as many of these as you can — within reason:
- Near windows: Try and make your beverage wall as visible as possible to people walking outside as a way to entice them to check your place out!
- Front of the establishment: It’s generally good practice to place the beverage wall at the front of your business to show it as a primary feature. We at PourMyBeer have seen great success with some of our customers that have their main drink wall located upfront for more visibility. An additional tip that we can provide is adding 10 or so more taps in the back of your business — this can boost your beverage sales even more.
- Multiple floors or spots: If you have multiple options for placement, consider splitting your self-pour setup across different areas to maximize beverage sales while ensuring no one in your place stays thirsty.
- Outside beer gardens: It’s always a good idea to use your outdoor space — if you have it. An outside area will allow your customers to spread out and enjoy some self-pour fun in the fresh air. This may not be possible for every climate, but we have seen some customers in California and other warmer climates have great success with an outside beer garden. Just ensure you have a great draft line system installer to ensure your beer temperature is on point.
- Near check-in stations: This is a good idea to make your customer flow as efficient and easy as possible. You want your customers to be able to step inside, check-in, and get to the beverage wall relatively quickly — without having to travel too far.


Finally, consider setting up your beverage wall in a way where you can replenish glasses from behind it — this way, your staff won’t have to get in the middle of customers as they restock. We have customers that replenish their glasses from below, such as Flourish in Oak Park or Tapster in Chicago. Check out the examples below.


2. Visibility
So you just got — or are getting — wall-mounted beer taps that will bring in more customers. Now what? Make sure your beer tap wall catches the attention of everyone who walks through your doors with eye-catching aesthetics and captivating design.
First things first, you will need to ensure that your community knows about your new drink wall and can see the taps and touch screens when passing by. The beverage wall should be the first thing a person sees when they walk into your establishment. Better yet, it should be visible through the windows so that passersby can see your self-pour setup as well as your customers having fun with it. This will make passersby curious and thus tempt them to come and experience it for themselves.
Don’t put the self-pour wall somewhere isolated in a way that makes it invisible to customers. You would be missing out on a significant opportunity for visibility that can be very valuable.
3. Space
Ensure you have enough room for the wall-mounted beer taps and ample space for your customers to comfortably move around and pour their favorite drinks. Remember your seated diners!
Leave plenty of space for customers to taste and serve themselves while giving way for folks dining in. Also, allow people to browse around freely without creating tight crowds that make it hard for other customers or staff to get by. The extra space by the beer tap wall should allow your customers to hang out for a bit while sampling a couple of beverages before going back to pour their full drink from the wall.
Part of achieving this comes down to exactly where you place your seating. If you have mobile tables and chairs only, this will be easy and more flexible as you can move things around as needed.
However, if there is any bolted or permanent seating, such as booths, you will need to be careful when planning the wall. Be sure to draw or use software to map out your floor plan. This plan should account for the size of the beverage wall and the desired space in front for customers to walk around.
Choosing the exact placement of the beverage wall at your specific venue will also be important. You want to ensure the ends of your drink wall are far from any sharp corners that will make it challenging for guests to access drinks on the ends. We also recommend placing the beverage wall against one of the shorter sides of a rectangular room, thereby giving you more space to spread out seating across the length of the room.
PourMyBeer Tip: You can also consider having a few bar-top tables or big kegs, which customers can utilize as temporary tables while tasting and sampling their self-pour beverages.
4. Access to Glasses
Provide easy access to glasses for your patrons to enjoy their self-poured beverages. Keep them stocked and organized within reach. The best — and perhaps, only — way to do this is to have a proper shelving station to house glasses — basically, a glass rack.
You can build a glass rack directly below the taps, off to the side, or even directly above the tap wall. Having glasses directly above or below the wall may require an integrated design into the drink wall. Some customers who choose the side option have their own separated shelves. Both are perfectly viable options, but make sure that any separate shelves are sturdy, heavy, and easy to clean.
In any case, the most important consideration is to make sure you avoid forcing customers to walk through any crowds to get glasses. Grabbing a glass to start the self-pour experience should be just as easy as enjoying the self-pour itself!
PourMyBeer Tip: Try to make the position of your beverage wall such that you can replenish the glasses from either the back to make it the easiest for your crew. You want to avoid forcing staff to walk through crowds of customers with glassware. Take our example from Flourish below.


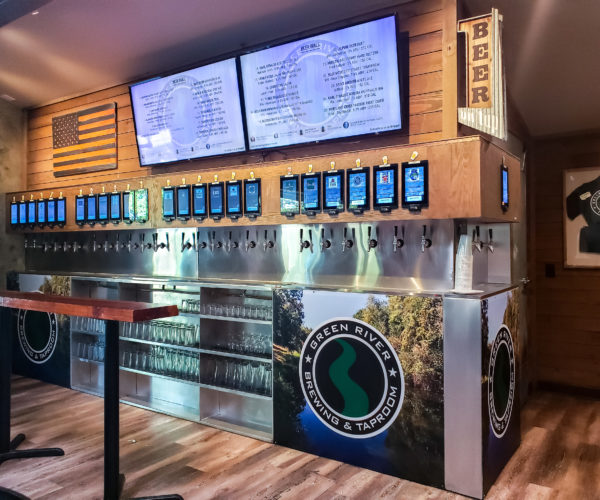
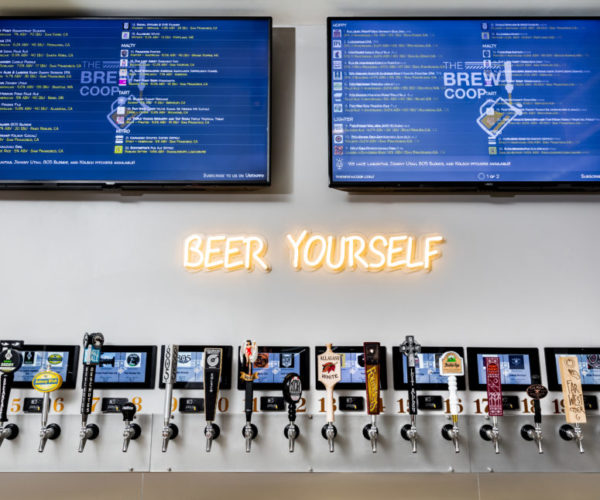
5. Untappd Menu Display
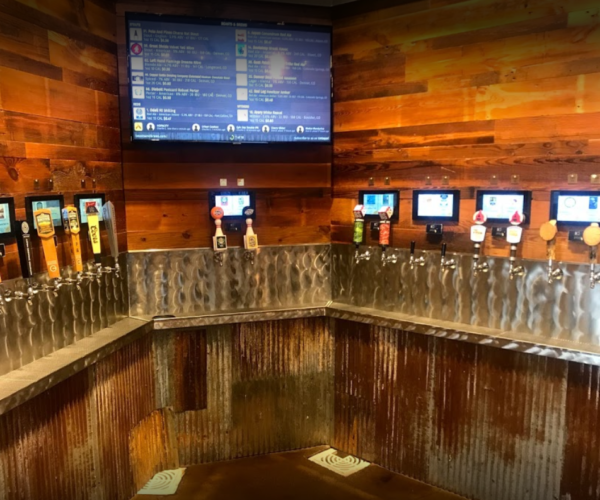
Create an attractive display menu showcasing the variety of drinks available on your drink wall, enticing customers to explore and try different options. We strongly recommend placing two large TV screens above your beverage wall — tapped into an Untappd feed — to show which beers are currently available on tap and which craft beers are coming soon.
Once you plan the location and size of your TVs, your PourMyBeer team can help you get the Untappd-PourMyBeer real-time feed to show up for your customers. Taking advantage of PourMyBeer and Untappd’s integration is something we always recommend to get the most out of your beverage wall.
Also, PourMyBeer’s software has an administrative feature for the operators, which can use the Untappd database to upload new beers onto your beverage wall. The taste notes and ABV of each drink will appear on PourMyBeer screens.
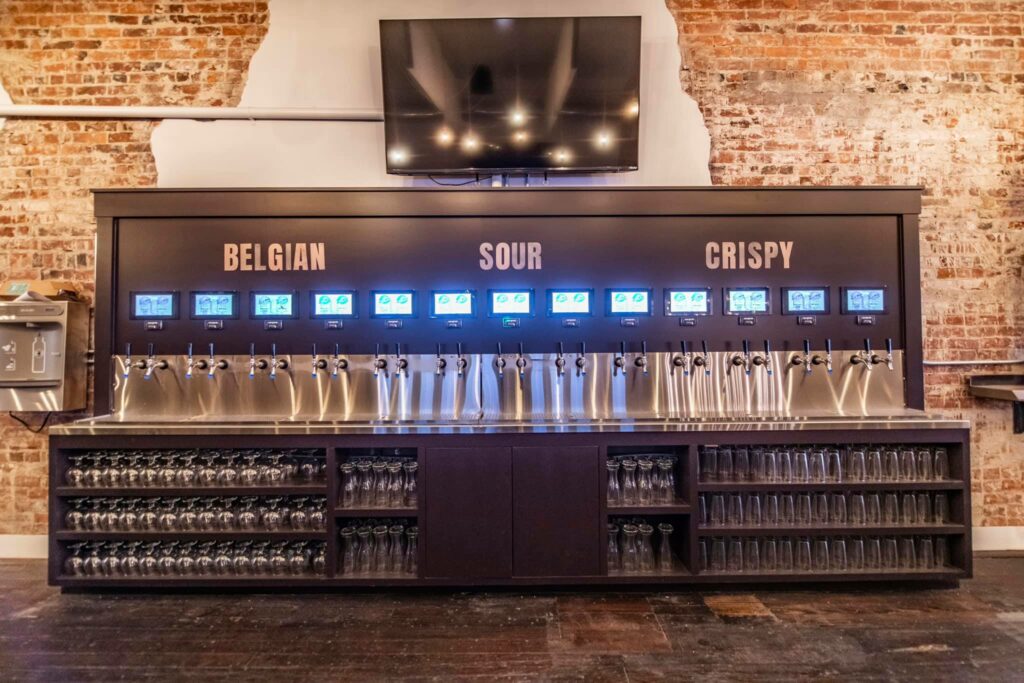
6. Clear Identification of Beverage Sections

One of the first decisions you will make when setting up your beverage wall is exactly how many taps and screens you will have to offer. You need to clearly label and separate different beverage sections to make it easy for customers to navigate and find their desired drinks.
The right number of taps depends on the space you have available and how many different beverage selections you plan to offer — these can range from craft beer, wine and cocktails to kombucha and even cold-pressed coffee. No matter what you’re offering, it’s always good to have a great blend of domestic creations and local craft ones.
To give your drink wall more personality and make things easier and more efficient for your customers, we recommend planning your beverage wall to be split into sections and adding signage to indicate them to customers. This can go a long way in making your customers’ self-pour journeys easier and more enjoyable, and it can be a great way to make things more approachable for self-pour first-timers.
You can have as many or as few sections as your beverage wall accommodates — they don’t need to be larger than two or three screens each. For example, if you’re offering a variety of beers, you can differentiate the styles with section signage such as IPAs, Pilsners, Ales, Sours, Stouts, Lagers and Ciders.
Recently, we’ve seen a rising trend with cocktails on tap. Several operators using PourMyBeer self-serve taps to pour cocktails have seen great success. The GM and Executive Chef at Beasts & Brews discusses their success after putting a margarita on tap and how it quickly became their new bestseller!
To learn more about cocktails on tap and how to batch-kegged cocktails, click on the button below! In our cocktails on tap blog, you’ll learn about the equipment you need, recipes for batched cocktails and more!
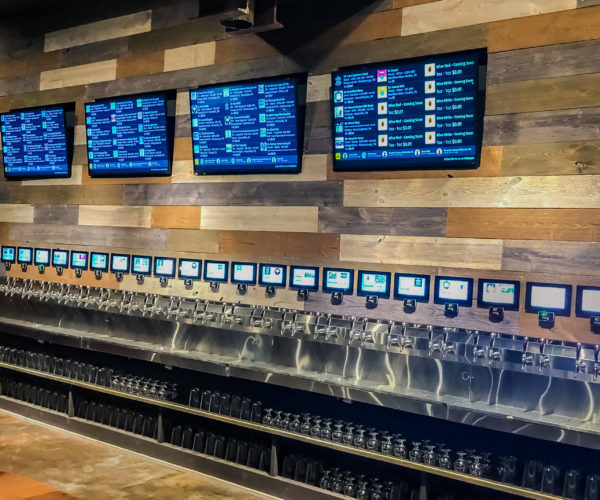
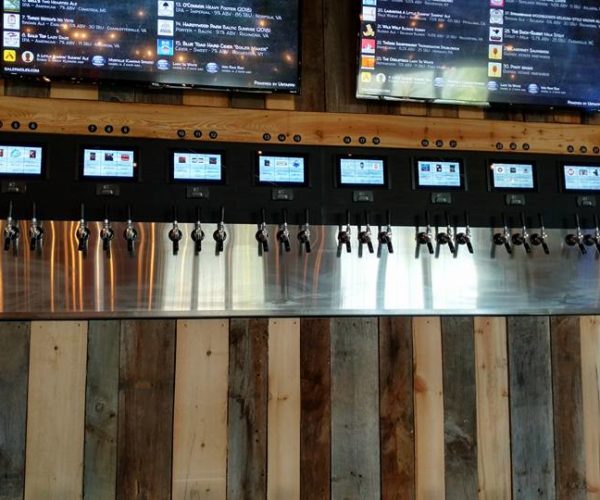
7. Spacing and Numbering Taps
In addition to thinking about all of your beverage offerings and how you can section them, you will also need to plan spacing between screens — which depends on how many taps per screen you will be offering. Label each beverage tap or assign numbers for easy identification and selection, ensuring a smooth and enjoyable pouring experience for your customers.
Here are the general spacing and numbering guidelines we recommend:
- Single screen or tap, portrait setup: You’ll need 7 inches from center screen to center screen and a total of 18 feet, minimum, of wall space.
- 2-tap-per-screen, landscape setup: You’ll need 13 inches from center screen to center screen and a total of 16 feet, minimum, of wall space.
- 3-tap-per-screen, landscape setup: You’ll need 14 inches from center screen to center screen and a total of 13 feet, minimum, of wall space.
Once the drink wall is set up, we also highly recommend numbering each tap. This makes it easier to identify which drinks are at which taps, and for customers, this can eliminate reasons to stand around the wall, which will speed things up as they enjoy the self-pour experience. For operators, the increased efficiency that comes with numbered taps will make maintenance much quicker, and the numbers even allow them to keep track of which taps — and their corresponding kegs — need to be maintained.
8. ADA Compliance
The Americans with Disabilities Act, or ADA, is a very important law that sets several standards requiring businesses to be accessible to customers with disabilities. Ensure your self-pour drink wall is designed to be accessible and compliant with ADA regulations, providing an inclusive experience for all customers.
Being ADA-compliant is not something explicitly required for businesses of all kinds, but it is always a good practice to have in place. It is a great way to ensure that all customers feel welcome at your establishment — you can even use it as a part of your marketing to reassure people that everyone is welcome.
For this reason, we recommend making sure your self-pour business is always ADA-compliant. Learn more on how you can make your beverage wall ADA-compliant — we’ve got a great rundown on which aspects of your draft beer system you will need to measure and adjust to maintain ADA compliance.
9. Signage
Use engaging signage and promotional materials to highlight the unique experience of your beer tap wall, enticing customers to come and try it out. Signage for your self-pour business will have two primary purposes — inform and market — and will be very important in both cases.
The first purpose is to inform. You will want to place signs at critical locations of your venue to make sure customers are immediately aware of where they should go and what they should do. Self-pour will be a first-time experience for many, and signage can be a great way to ensure guests aren’t overwhelmed or confused.
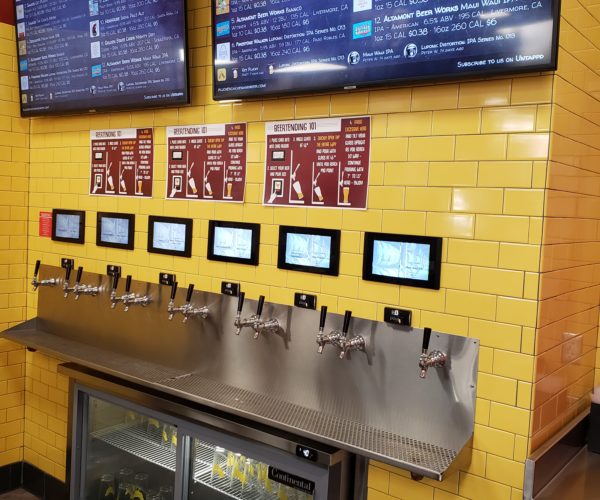
Place signs at the entrance to tell them to check in with staff and get their RFID cards and wristbands. At the beverage wall, place signage indicating the step-by-step process of how to use PourMyBeer technology and the best method when doing so.
Also, consider playing videos around your wall like the two shown below. By playing videos like these playing around your beverage wall, you will be more likely to grab customers’ eyes while explaining the process.
Play this video next to your beverage wall to show customers exactly how self-pour works with this step-by-step tutorial! Not only will it help those self-pour first-timers, but it’ll also add a great visual element to your wall!
And when adding signage to your wall, even if staff members don’t manage to communicate with every customer, there is still a salient place for them to look to clear up any confusion.
The second purpose of signage is to market. Signs of this purpose are more likely to be placed outside your establishment — unlike informative signs — but they are useful indoors as well.
Place signs outdoors that grab attention, with messages stating how easy and fun self-pour is. Inside, you can place similar signs, giving customers reasons to return. Advertise loyalty programs, special events or even popular or staff picks from the beverage wall.
For ideas and examples of PourMyBeer signage, check out the page below.
Tap Into Your Profits With PourMyBeer’s Self-Pour Solutions

Now that you’ve reached the end of our guide on setting up your beverage wall, we hope you’re feeling inspired and ready to take your establishment to new heights with a jaw-dropping beer tap wall. Remember, creating a drink wall is all about enhancing the customer experience and creating a buzz around your venue. If you’re ready to make it happen, we recommend reaching out to PourMyBeer.
With our innovative self-pour technology solutions, we can turn your vision into a reality. So, what are you waiting for? Contact PourMyBeer today for more information, and get ready to pour your way to success! Cheers!


(312) 416-9989